Natural Light Portrait Photography | TIPS and REAL EXAMPLES
Shooting with natural light is full of unpredictability, which is exactly why many photographers find it challenging and exciting. Ever since starting my photographic journey, I’ve always been drawn to natural light because it allows me to create a certain atmosphere and, thus, translate the idea I have in mind into a photograph.
Light is a crucial element to photography: no wonder the word photography itself means painting with light.
As much as studio photographers love the control the studio environment provides them, I love the spontaneity and adrenaline of catching the perfect ambient light.
That means getting used to different lighting conditions, but it also makes you better as a photographer because you gain experience and flexibility.
These are some of the most common natural light setups:
BACKLIGHT
One of the first rules you learn on a photography course or class is: don’t shoot with your light source positioned behind your subject.
That is — don’t do it unless you want to break the rules and have fun experimenting The lowering sun during the golden hour is perfect for backlit photos because of the softer shadows it casts.
Tip: if you want to see the model’s face in the image, overexpose it and bring back the contrast in post.
Make sure to always shoot in RAW so that you have the versatility of toying with settings in your editing software of choice. Another way is to use a reflector and direct some soft light in the model’s face.

This photo was shot with my model Mietta near an amusement park where was our primary location.
The sun was setting low and I positioned Mietta in front of the sun, the backlight casting a warm tone to the image. It was created without any reflectors and I pulled up the brightness of her face in Photoshop.
SUNNY DAY
During a sunny day I prefer to shoot in the golden hour that enriches photographs with a beautiful warmth and glowing colours. The golden hour is the time of day one hour before sunset, and is the favourite lighting setup of many photographers who work with natural light.
Those few minutes after sunset (during the so-called blue hour), with their cooler tones, are superb to use for a darker theme, but it’s important to have everything already prepared because it gets dark quickly.

I shot this with my friend and model Lisette during the golden hour in summer. The light had a specific warm glow that looked beautiful on Lisette’s blonde hair.
We shot this in my garden and I thought it had a slightly vintage feel to it, so I decided to create a colour palette that would match that mood.
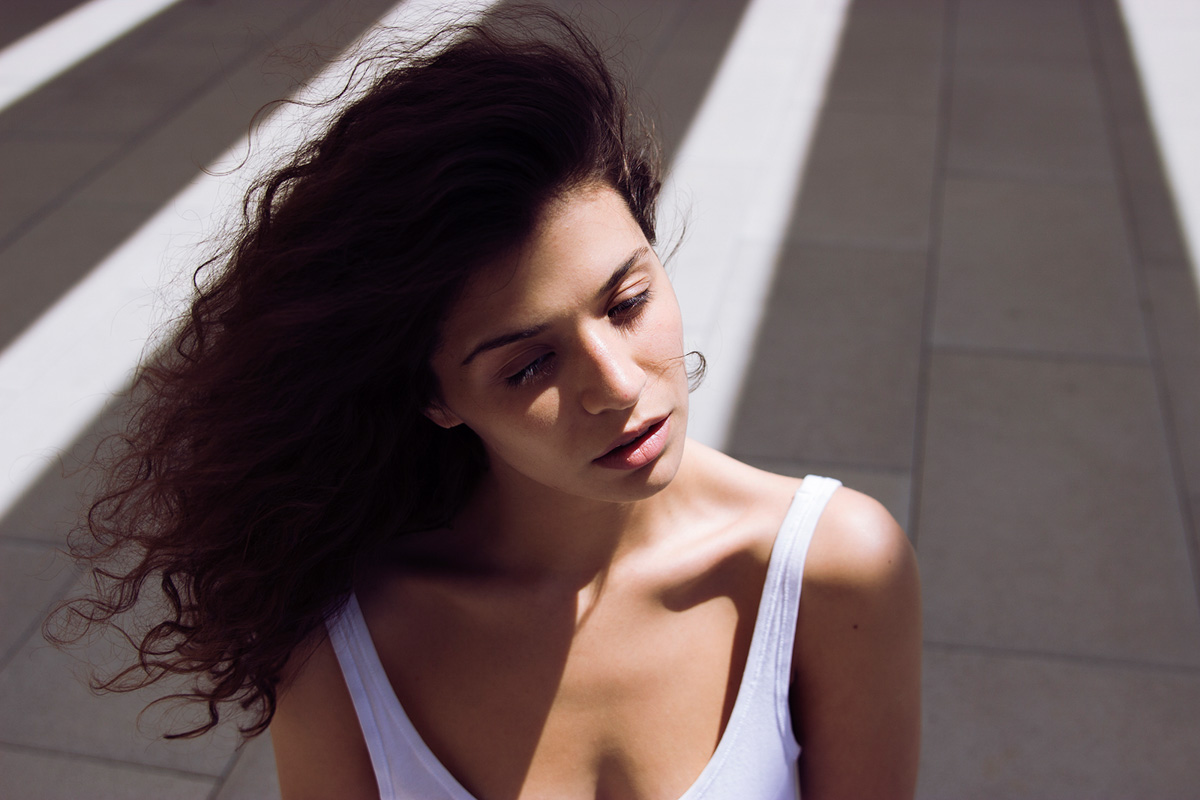
Shooting at noon, especially in the summertime, is not such a good idea for portraiture: the sun is set at almost 90 degrees, casting deep dark shadows underneath the model’s face.
In that situation, I would either use a reflector, or opt to shoot in the shadows instead. A shadowy area (like the one underneath a roof or trees) will shape the model's face with softer light.
However, shooting in harsh sunlight gives you more of a fashion feel with high contrast between lights and shadows.
You can use a reflector to add some additional light into the model, or the model should tilt their head in a way that will enhance their features.

I created this self portrait on a sunny spring day. Since the sun was high and the light direct and harsh, I tilted my head on one side. This way, one part of the face is deep in the shadows, while the light enhanced my cheekbones on the other side.
The yellow tracksuit created a pleasing contrast with the blue sky, which I further deepened in post-processing, allowing the yellow to really stand out against the background.
CLOUDY DAY
Although the images taken on an overcast day can sometimes seem flat, I love shooting under a grey sky, as it allows me not to care too much about harsh shadows.
Clouds act as a giant softbox, evenly dispersing sunlight that goes through them, which makes cloudy days great for portraits.
What might be missing during cloudy days is that spark in the model's eyes which can leave them with a rather blank expression. That also depends on the way the model's head is tilted and how much light is coming into their eyes.
You can always use a reflector if you wish to bounce some light back into the model's face.

In wintertime the sky is mostly cloudy and gloomy and that’s why Stella’s features matched perfectly with the dark tall trees behind her. We shot this in the middle of the day using pure natural light. Since this wasn’t a classical portrait I didn’t mind the shadows — they even made the photo look more in tune with the overall theme.

We shot this on the beach on Ibiza for the campaign Logomania by the Croatian designer Iggy Popović.
PLAYING WITH SHADOWS
One great thing about sunny days is playing with shadows in all ways possible. Use a hat with tiny holes, tulle, lace, plants; basically anything where a beam of sunlight can get through.
I have also used reflecting objects, such as CDs, small pieces of glass, a candle holder and even a sequined dress.
Properly positioned, all of these materials allowed me to create interesting effects on the models' faces by using the simplest of means - basic sunlight.
I am always like a magpie on flea markets too. There is a plethora of shiny objects and clothing that people want to sell and get rid off.

A sunny spring day made it possible to have interesting shadows on Laura’s face. The park where we shot it had a beautiful blossoming tree and I underexposed the shot and pulled up the shadows in Camera RAW. It’s always better to shoot RAW than JPG simply because it allows you more options in post-processing!
This is another example while it's important to shoot in RAW. I underexposed this shoot to keep the details in the highlights and in post-processing brightened up the dark areas. That way you still keep visual information in the highlighted areas.

For this photo, we used a sequined piece of fabric to create some visual light effects. The light falling on the model's face is coming from the window, but since it was a sunny day outside, it enabled us enough light to bounce it off the sequined fabric right into the model.
WINDOW LIGHT
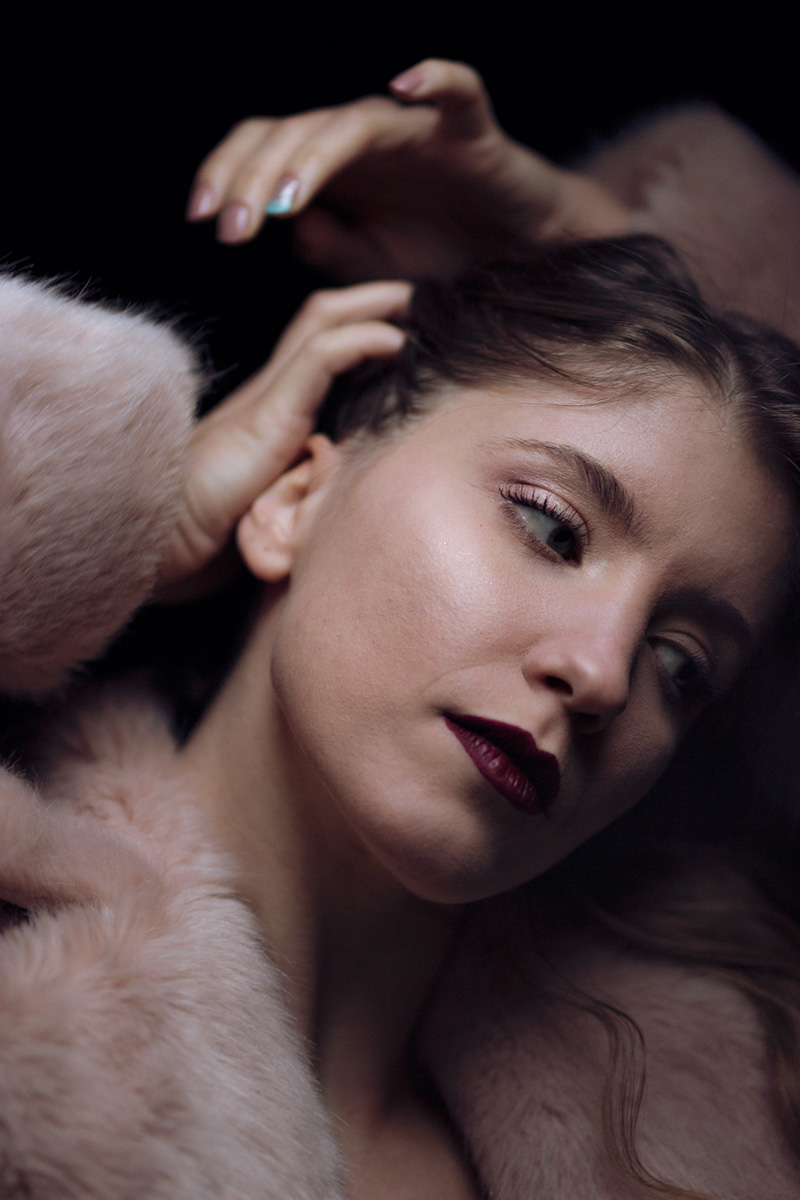
Window light is my absolute favourite. It produces soft shadows that don’t lack depth, and is ideal for portraiture because it shapes the model’s face in a very pleasing manner.
Placing the model closer to the window will have a ‘retouching’ effect on the skin, evening out pores and pimples, while placing the model further away is suitable for moodier shots.
Depending on the day outside, it can result in warmer or cooler tones, as well as give you more brightness during sunny days.
The time of day is also incredibly important. For example, one room in my house has more light during the morning because sunlight is peaking in, while the room on the other side of the house has more sunlight during midday.
But because the colour and feel of morning sunlight is not the same as the one during midday, we could get two completely different photos even if we had the exact same model in the same pose!

Self-portrait done lying on the floor below a big window (on the right side of the image). The soft light created gradual shades because it was cloudy outside. If I would’ve shot this on a sunny day, the light areas on the plant would’ve been completely blown out.
This portrait of the dancer Ema Janković was shot using a single source of light - a window above her head. Would you ever guess that we shot this in the attic?