How to Shoot Portraits With Christmas Lights - [TUTORIAL]

Tis the season for hot wine, Christmas carols and twinkling lights!
I know you’re here because you love those lights as much as I do. I’ve been having fun with them in my portraiture and self-portraiture work for a couple of years now, but my favourites are those where I used long exposure.
If you are not familiar with long exposure, it basically means keeping your camera’s lens open for a longer period of time.
This means it will collect more light and, since more TIME is involved, it will show motion blur even if you do a small body movement.
Have you ever seen those 100 years old family portraits, with the whole family standing very still, wide-eyed? The technology back then wasn’t sophisticated so they needed to use long exposure to have enough light for a photograph.
That’s why the whole family would gather up and they would stand for anywhere up to twenty minutes in absolute stillness.
However, nowadays we have the ability to shoot clear photographs even in bad lighting. But there is still something eerie and interesting about blurry shots and that is why we keep going back to it.
The mind likes a challenge.
There are a couple of things to think about when working with Christmas lights (or any other small source of light) and long exposure.

This image wasn’t shot in complete darkness. It was during the blue hour (the last hour of light in the day, immediately after sunset) and this allowed for the face to be softly lit by window light.
1. AMBIENT LIGHT
How much those twinkling lights are going to be visible depends a lot about the other light that is present where you are shooting - ambient light.
If you want to create images in absolute darkness, you will need to use a lot longer exposures than if you’d happen to have some daylight.
One thing to keep in mind as well is the colour. If you’re surrounded by darkness, then the colour will be black on the photo (obviously, Sherlock haha!).
But if you happen to have some blue hour light, it will give you blue tones.
On early mornings, there will be some brisk cold light.
It’s a matter of preference and ideas.
If you want to prolong your exposure during the day, you’ll need to use ND filters that you will put directly on the lens and will thus be able to shoot in rather bright places with a low shutter speed (giving you long exposure).

Some of the failed attempts at creating a selfportrait with lights. I didn’t like how blurry some of the shots were, nor the absolutely clarity of the others. That is why I needed to retake the photos numerous times before finally nailing the right combination of shutter speed and my body movement.
How long the exposures are going to be depends on your camera’s sensor as well. Some cameras (especially full-frame ones) can offer you a much higher range of ISO without losing any quality of the photos.
However, cameras with a cropped sensor are likely to give you a lot of noise (grain) if you push your ISO too high.
Do not let that discourage you. If you are working for clients, quality is expected and important.
But if you are shooting portraiture for yourself or for fun, feel free to easily blast your ISO super high and see how it will turn out.
Grain in photographs feels rather nostalgic; it reminds us of film cameras, with all of their unexpectedness and ‘‘flaws’’.
2. TIMING IS EVERYTHING
When it comes to creating portraits like these, timing really means the world. It’s a thin line between a random blurry shot and an expressive caption. Most of it, I must say, is down to the model.
The model will need to experiment a bit before getting it right and that’s okay. Understanding the technical side of photography will come very handy at this point.
Sometimes I feel this part of modeling is like dance.
It boils down to tempo, rhythm, movement and perfect timing. Once again, it’s all about what you want to achieve with your shot.

On the image above the shutter speed was set on ⅛ s, which was enough to move just a tiny bit and get a shaky-looking photograph.
You can see the exact movement if you look more closely at the red lines of light! It was more of a jump than a smooth move.

A much longer exposure time (4 seconds!) was used to achieve the effect on the photo above. It was not created with two different shots, but it was captured in camera the way you see it (the only thing I had altered in Photoshop was the colour).
For two seconds I was in one position (the left), then quickly changed to the other pose on the right.
Almost two seconds for each pose was enough time to capture the figure rather well, while still maintaining the blurry traces of the lights during the movement from one pose to the next.
3. THERE’S NO RIGHT WAY
I’d like to share with you my formula for great shots - but there isn’t any.
You will need to figure it out by yourself, taking into considerations factors such as the time of day, the source of light, your gear (the lens you’re using, your camera’s sensor sensitivity) and the movement of the model in front of you.
Do yourself a favour and use a tripod (or a chair/desk if you don’t have a tripod) - it will stabilize your image and you won’t be dependent on the accidental movement of the camera.
All I can do now is encourage you not to give up, to experiment and learn along the way. If something doesn’t work out - start again. Over and over again until you get results you are proud of.
With that in mind, I wish you all happy snapping!
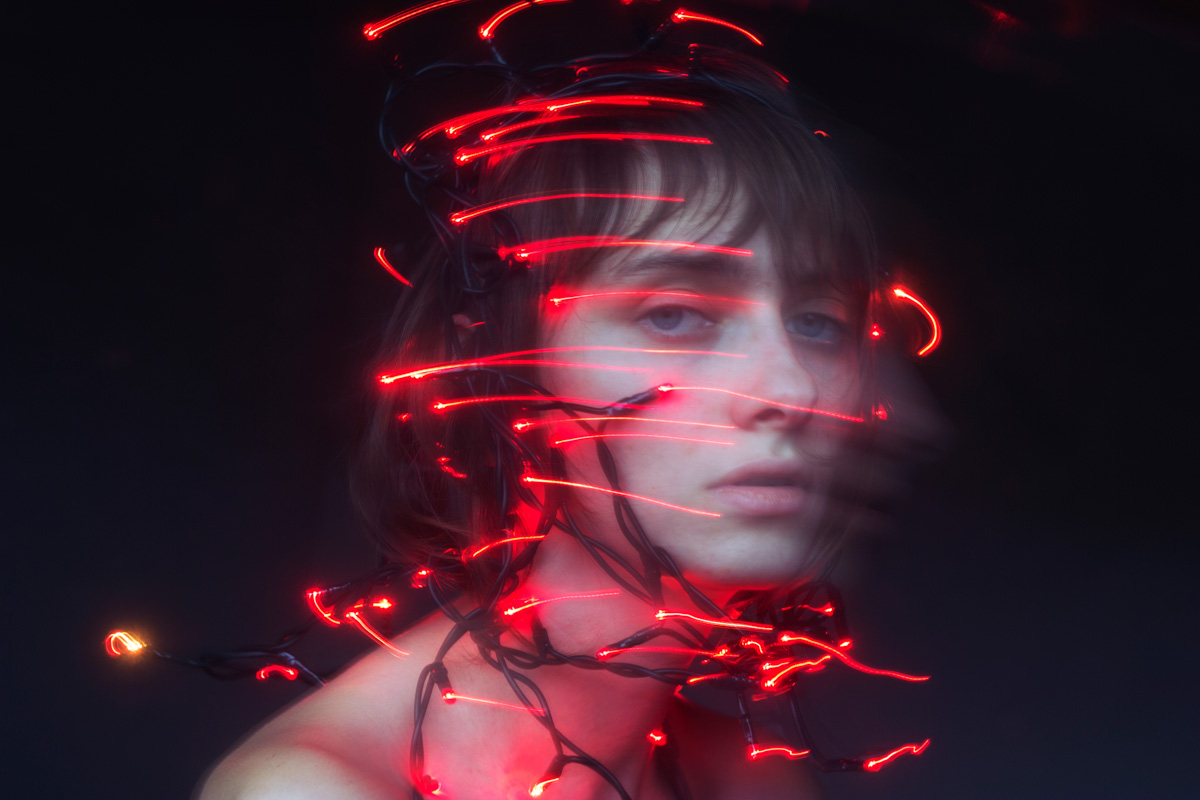
What you can decipher from this image: one pose was held much longer than the other one. That is why there is only a slight blur on the right, as well as the traces of the moving lights.


